
Do you have a shapefile and want to view your work on Google Earth but don’t know how to do it? In this article, I’ll explain how!
Let’s start by listing what you’ll need:
- QGIS (if you don’t have it yet, download and install it from here)
- Google Earth (if you don’t have it yet, download and install it from here)
- A georeferenced shapefile (I won’t talk about georeferencing today, apologies)
- A bit of patience (a must-have!!)
First, open QGIS and load your .shp file. In this mini-guide, I’ll use the municipal boundaries of the town of Casalnuovo di Napoli as an example.

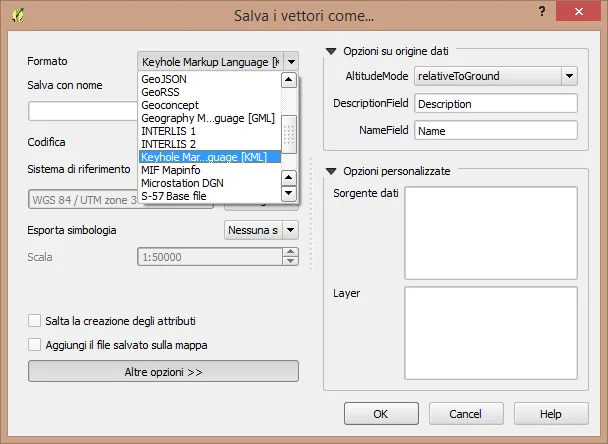
At this point, right-click on the name of the shapefile that appears in the “Legend” and then left-click on “Save As.”

A window will open, which is very simple and intuitive. As you can see, among the many customization options, there is a “Format” option, which is what we are interested in. In the dropdown menu that appears when you click the down arrow next to "Format," the option we are looking for is “Keyhole Markup Language [KML].” After choosing the format and making any desired customizations, left-click on “OK,” and your .kml file will be saved in the location you selected, ready to be opened in Google Earth!
Now all that’s left to do is double-click on the .kml file you obtained and admire your former shapefile as it opens in Google Earth!
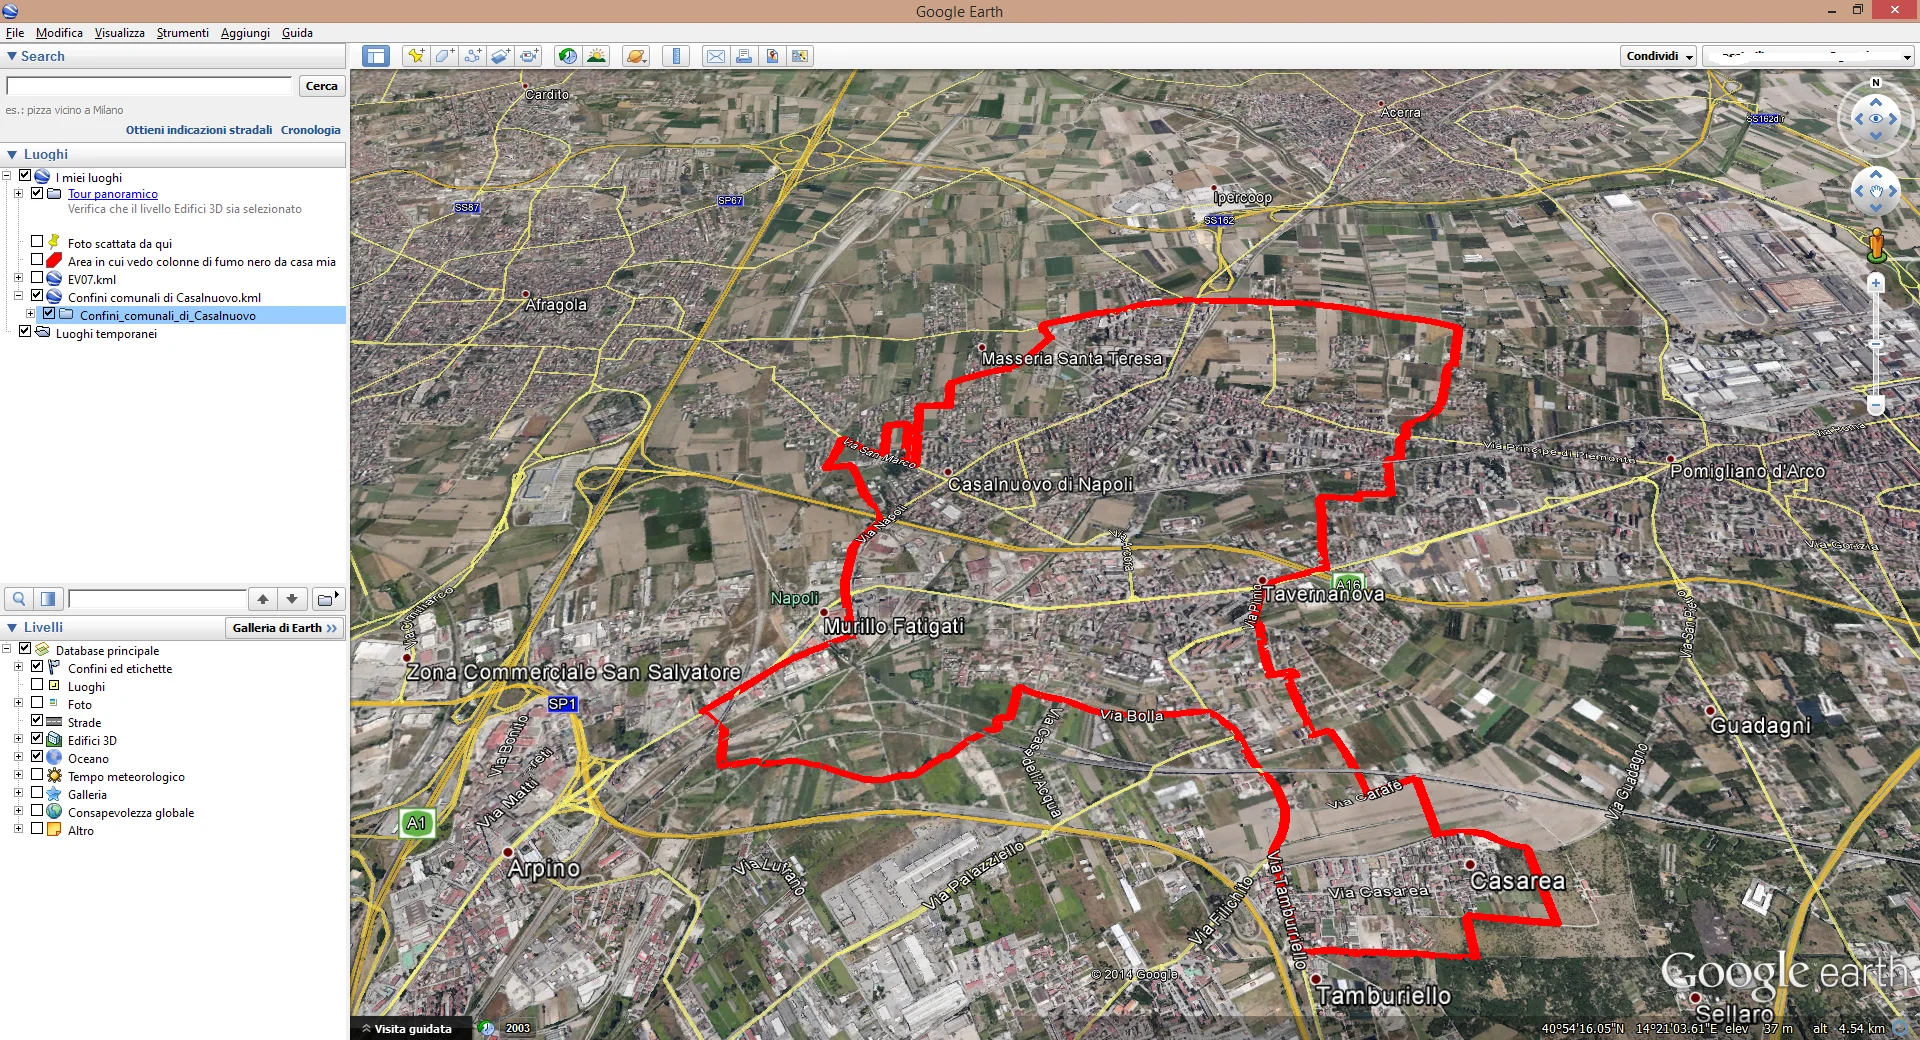
Note that the fill colors disappear automatically when opening the .kml file. To improve visibility, I increased the stroke thickness by modifying the values in the polygon properties in Google Earth.